The Ultimate FastAPI Tutorial Part 13 - Using Docker to Deploy Your App
In part 13 of the FastAPI tutorial, we'll look at containerizing our example application
Introduction
Welcome to the Ultimate FastAPI tutorial series. This post is part 13. The series is a project-based tutorial where we will build a cooking recipe API. Each post gradually adds more complex functionality, showcasing the capabilities of FastAPI, ending with a realistic, production-ready API. The series is designed to be followed in order, but if you already know FastAPI you can jump to the relevant part.
Code
Project github repo directory for this part of the tutorial
Tutorial Series Contents
Optional Preamble: FastAPI vs. Flask
Beginner Level Difficulty
Part 1: Hello World
Part 2: URL Path Parameters & Type Hints
Part 3: Query Parameters
Part 4: Pydantic Schemas & Data Validation
Part 5: Basic Error Handling
Part 6: Jinja Templates
Part 6b: Basic FastAPI App Deployment on Linode
Intermediate Level Difficulty
Part 7: Setting up a Database with SQLAlchemy and its ORM
Part 8: Production app structure and API versioning
Part 9: Creating High Performance Asynchronous Logic via async def and await
Part 10: Authentication via JWT
Part 11: Dependency Injection and FastAPI Depends
Part 12: Setting Up A React Frontend
Part 13: Using Docker, Uvicorn and Gunicorn to Deploy Our App to Heroku
Part 14: Using Docker and Uvicorn to Deploy Our App to IaaS (Coming soon)
Part 15: Exploring the Open Source Starlette Toolbox - GraphQL (Coming soon)
Part 16: Alternative Backend/Python Framework Comparisons (i.e. Django) (Coming soon)
Post Contents
Theory Section - Why Deploy With Containers?
Theory Section 2 - Uvicorn and Gunicorn with FastAPI
Practical Section 1 - Running Locally
Practical Section 2 - Deploying the Backend to Heroku
Practical Section 3 - Deploying the Frontend to Heroku
![]()
Theory Section 1 - Why Deploy With Containers?
In modern web development, deploying with containers tends to be the overwhelming choice because it makes it much easier to scale web applications using container orchestration tools such as Kubernetes and AWS Elastic Container Service (ECS). Using containers also has many benefits for developers and for testing, since it ensures a consistent development environment across different machines (even if they are running completely different operating systems).
A full treatment of Docker and containerization is beyond the scope of this tutorial, but if you need a refresher I have a couple of videos that will help:
In this post we’re going to deploy our FastAPI backend as a container, and we’ll also upgrade our toy SQLite DB to postgreSQL (although if you’re indie hacking, don’t underestimate SQLite!)
We’re going to deploy our FastAPI application to Heroku, a tried and tested Platform as a Service (PaaS). A PaaS basically simplifies the running of our infrastructure, so we don’t have to worry about setting up virtual machines or configuring Nginx and TLS certificates.
Heroku supports container deployments and has a container registry where we can publish our docker images.
Theory Section 2 - Uvicorn and Gunicorn with FastAPI
To run a FastAPI application in a remote server machine, you need an ASGI server program like Uvicorn
When we work locally (as we have done for much of this tutorial), Uvicorn runs in a single process on our computers. However, when deploying applications then replication of processes to take advantage of multiple cores is desirable as it means your server can handle more requests.
Why use Gunicorn with Uvicorn?
Uvicorn provides a lightweight way to run multiple worker processes, for example --workers 4, but does not provide any process monitoring.
This is why we also bring in Gunicorn, so that we can:
- Manage dead processes
- Restart new processes if needed to keep the number of workers and therefore…
- …Take advantage of multi-core CPUs
- In short, to get the best of concurrency and parallelism
On the flipside, Gunicorn also needs Uvicorn to work with FastAPI (see details here), since Gunicorn is built on the WSGI standard, whereas FastAPI is built on the ASGI standard.
Therefore, we use a Gunicorn-compatible Uvicorn worker class to convert data sent by Gunicorn to the ASGI standard for FastAPI to use it.
Uvicorn includes a Gunicorn worker class allowing you to run ASGI applications, with all of Uvicorn’s performance benefits, while also giving you Gunicorn’s fully-featured process management.
In summary:
- Run
uvicorn --reloadfrom the command line for local development. - Run
gunicorn -k uvicorn.workers.UvicornWorkerfor production.
Practical Section 1 - Running Locally
Although we won’t need it for the actual deployment, for local development we’ll be making use of Docker Compose so we can easily create a postgreSQL database for our app to connect to.
Compose is a tool for defining and running multi-container Docker applications. With Compose, you use a YAML file to configure your application’s services. Then, with a single command, you create and start all the services from your configuration
If you need a refresher on compose, here’s a video I made on the tool:
Our first step is to create a Dockerfile. Now our application structure really starts to mirror the official FastAPI fullstack starter repo, which at first seems to have an excessive amount of nesting, but once you’ve got everything Dockerized starts to make a lot of sense.
A new directory layer appears to make room for our Dockerfile:
Example project part 13 structure:
backend/
├── app
│  ├── alembic
│  ├── alembic.ini
│  ├── app
│  ├── example.db
│  ├── poetry.lock
│  ├── prestart.sh
│  ├── pyproject.toml
│  └── run.sh
├── assets
└── Dockerfile    <------------ New arrival
There are no other changes to key files (such as main.py).
Let’s checkout the Dockerfile:
Dockerfile
FROM python:3.9

# create the app user
RUN addgroup --system app && adduser --system --group app

WORKDIR /app/

# https://docs.python.org/3/using/cmdline.html#envvar-PYTHONDONTWRITEBYTECODE
# Prevents Python from writing .pyc files to disk
ENV PYTHONDONTWRITEBYTECODE 1

# ensures that the python output is sent straight to terminal (e.g. your container log)
# without being first buffered and that you can see the output of your application (e.g. django logs)
# in real time. Equivalent to python -u: https://docs.python.org/3/using/cmdline.html#cmdoption-u
ENV PYTHONUNBUFFERED 1
ENV ENVIRONMENT prod
ENV TESTING 0

# Install Poetry
RUN curl -sSL https://raw.githubusercontent.com/python-poetry/poetry/master/get-poetry.py | POETRY_HOME=/opt/poetry python && \
    cd /usr/local/bin && \
    ln -s /opt/poetry/bin/poetry && \
    poetry config virtualenvs.create false

# Copy poetry.lock* in case it doesn't exist in the repo
COPY ./app/pyproject.toml ./app/poetry.lock* /app/

# Allow installing dev dependencies to run tests
ARG INSTALL_DEV=false

RUN bash -c "if [ $INSTALL_DEV == 'true' ] ; then poetry install --no-root ; else poetry install --no-root --no-dev ; fi"

COPY ./app /app
RUN chmod +x run.sh

ENV PYTHONPATH=/app

# chown all the files to the app user
RUN chown -R app:app $HOME

# change to the app user
# Switch to a non-root user, which is recommended by Heroku.
USER app

# Run the run script, it will check for an /app/prestart.sh script (e.g. for migrations)
# And then will start Uvicorn
CMD ["./run.sh"]
I think the comments in the file do a good job of explaining what is going on. A few things to note:
- We inherit from the Python 3.9 docker image which is why we don’t need to install Python. This is a linux image, and you can choose the alpine variety if you prefer (though you may need to update the Dockerfile install commands).
- We install and configure our dependency manager - poetry, some gotchas with just installing via pip hence using curl. Note
that because we’re using poetry then project dependencies are not in a
requirements.txtfile but rather in apyproject.tomlfile. It also means that once poetry is installed we do not need to run pip commands (we use poetry commands). - We set the Docker CMD instruction to our familiar
run.shbash script. This will be the command passed to our executing container.
It’s important to note that we’ve also modified run.sh with some more functionality:
run.sh
#!/bin/sh

# Heroku postgres addon
export SQLALCHEMY_DATABASE_URI=${DATABASE_URL}  # 1

# If there's a prestart.sh script in the /app directory or other path specified, run it before starting
PRE_START_PATH=${PRE_START_PATH:-/app/prestart.sh}  # 2
echo "Checking for script in $PRE_START_PATH"
if [ -f $PRE_START_PATH ] ; then
    echo "Running script $PRE_START_PATH"
    . "$PRE_START_PATH"
else
    echo "There is no script $PRE_START_PATH"
fi

export APP_MODULE=${APP_MODULE-app.main:app}
export HOST=${HOST:-0.0.0.0}
export PORT=${PORT:-8001}  # 3
export BACKEND_CORS_ORIGINS=${BACKEND_CORS_ORIGINS}  # 4


# run gunicorn
exec gunicorn --bind $HOST:$PORT "$APP_MODULE" -k uvicorn.workers.UvicornWorker  # 5
Some of these adjustments are key, so let’s look at a few of the commented areas in the file:
- We set the
SQLALCHEMY_DATABASE_URIequal to theDATABASE_URLenvironment variable. This is how we configure the database connection string correctly (including for migrations). This is set as astrin the config.py file run.shwill now call anotherprestart.shscript if it exists within the app directory. This is a technique borrowed from FastAPI creator Tiangolo’s uvicorn-gunicorn-docker image, an image which he advises in the docs is probably overkill for your needs. Theprestart.shscript serves the important purpose of running our alembic migrations (see Part 7 for a full treatment of alembic and DB migrations) and adding our initial data (like a super user). We’ll look at this file next.- The
PORTis set based on the environment variable. This is a requirement for deploying to Heroku as ports cannot be pre-assigned. - We pass in the allowed CORS origins (see part 12 for information on how this works)
- Our container execution command now switches from
uvicorntogunicorn, for reasons discussed in the second theory section at the top of this post.
Now let’s look at the presstart.sh bash script referenced in the run.sh script:
prestart.sh
#! /usr/bin/env bash

# Let the DB start
python ./app/backend_pre_start.py

# Run migrations
alembic upgrade head

# Create initial data in DB
python ./app/initial_data.py
This ensures that when our container starts up, whichever database it is configured to connect to will have the correct tables generated. So how are we going to connect to a database? We’ll look at that now.
PostgreSQL Local Development With The FastAPI Web Framework
Until now we’ve been using SQLite as our database, which has meant our DB was just a file. Postgres is a full relational database management system (RDBMS) which means it needs its own server to run. For local development you have two main options:
- Install and run postgres locally - My preference, because you don’t have to have docker running to connect to the DB. The downside is that you’ve got to install and configure postgres
- Run postgres as a docker container - Clearly the easier option for this tutorial, since almost all postgres installation and config can be skipped.
To follow along (and if you want to learn, you should), you’ll need to install:
This is what is found in newly added part-13-docker-deployment/docker-compose.local.yml file:
docker-compose.local.yml
version: "3"
services:
  db:
    image: postgres:14  # https://hub.docker.com/_/postgres  # 1
    ports:
      - "5433"  # 2
    volumes:
      - app-db-data:/var/lib/postgresql/data/pgdata  # 3
    environment:  # 4
      # This optional variable can be used to define another location -
      # like a subdirectory - for the database files.
      - PGDATA=/var/lib/postgresql/data/pgdata
      - POSTGRES_SERVER=db
      # This optional environment variable is used in conjunction with POSTGRES_PASSWORD
      # to set a user and its password. This variable will create the specified user with superuser
      # power and a database with the same name. If it is not specified, then the default user of
      # postgres will be used.
      - POSTGRES_USER=postgres
      # This environment variable is required for you to use the PostgreSQL image.
      # It must not be empty or undefined. This environment variable sets the superuser
      # password for PostgreSQL. The default superuser is defined by the POSTGRES_USER environment variable.
      - POSTGRES_PASSWORD=password
      - POSTGRES_DB=app

  web:
    build:
      context: ./backend  # 5
      dockerfile: Dockerfile  # 6
    depends_on:
      - db
    ports:
      - "8001:8001"  # 7
    volumes:
      - ./backend/app:/app  # 8
      - ./backend/assets:/assets
    environment:  # 9
      - DATABASE_URL=postgresql://postgres:password@db:5432/app
      - DATABASE_TEST_URL=postgresql://postgres:password@db:5432/app_test
      - BACKEND_CORS_ORIGINS=["http://localhost:3000","http://localhost:8000"]
volumes:
  app-db-data:
Lots happening in this file, let’s break it down:
- For our
dbservice, we pull the official postgres 14 docker image. This image comes with a number of helpful configuration options we’ll touch on in a moment. - We specify a container port
- We set a docker volume for the containerized database local persistence (note that you should not do this in production)
- We configure the environment variables - these need to match the
webcontainerDATABASE_URLparts, as per the postgres connection string format - For this app directory structure, our
Dockerfileis not in the same directory as thedocker-compose.local.yml, so we need to pass a context so Compose can find the right Dockerfile - The Dockerfile used for building the
webimage - This is the
HOST:CONTAINERport mapping. If you have the FastAPI app running locally from other sections of the tutorial you’ll need to stop it to free up port 8001. - By using volumes for the app source code, we can avoid having to rebuild the image whenever we make a change to our code
- We ensure these environment variables are set - the
Settingsobject in backend/app/app/core/config.py expects to find aDATABASE_URLenvironment variable - link to source line.
Let’s test it all out!
Make sure you are in the directory part-13-docker-deployment, then run:
docker-compose -f docker-compose.local.yml up -d
The first time you run this command, the postgres image will be pulled from Docker Hub and the FastAPI application will
be built from your local Dockerfile. This will take a few mins. Once it’s complete, when you run docker ps you should
see two containers running:

We’ve basically done docker run for both containers.
Now navigate to http://localhost:8001 and you should see our interactive REST API swagger docs, where we can specify JSON POST request bodies. You can sanity check your new
postgreSQL local database by creating a new user with the interactive documentation:
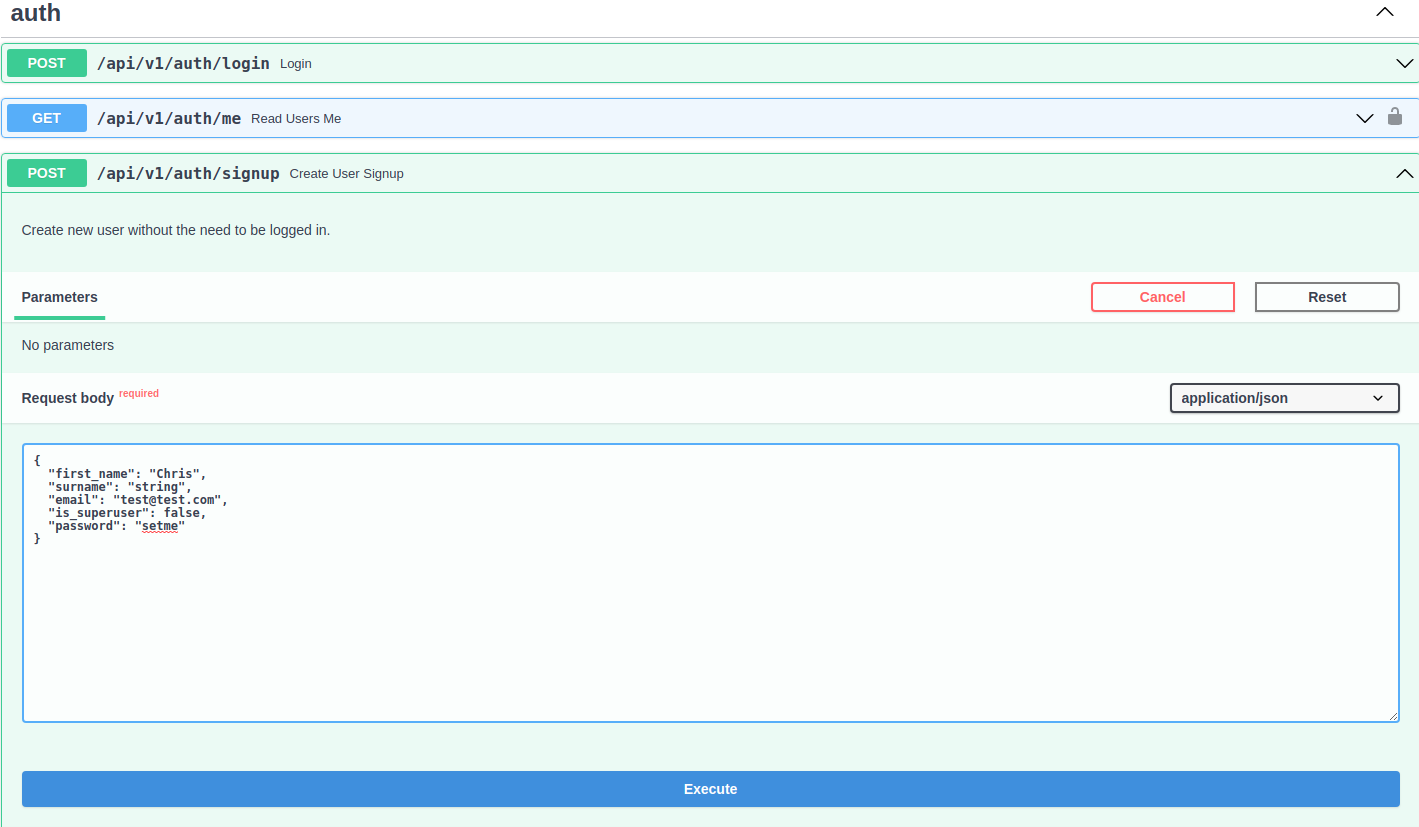
Create a user with the /api/v1/auth/signup endpoint.
Then exec into the running container like so:
docker-compose -f docker-compose.local.yml exec db psql -U postgres(Note, you’ll need to set thePOSTGRES_USERtopostgresfor this to work)
You should see the postgres interactive shell:
- Connect to the DB with
\c app - View the tables with
\dtYou should see:alembic_version,recipe, anduser.
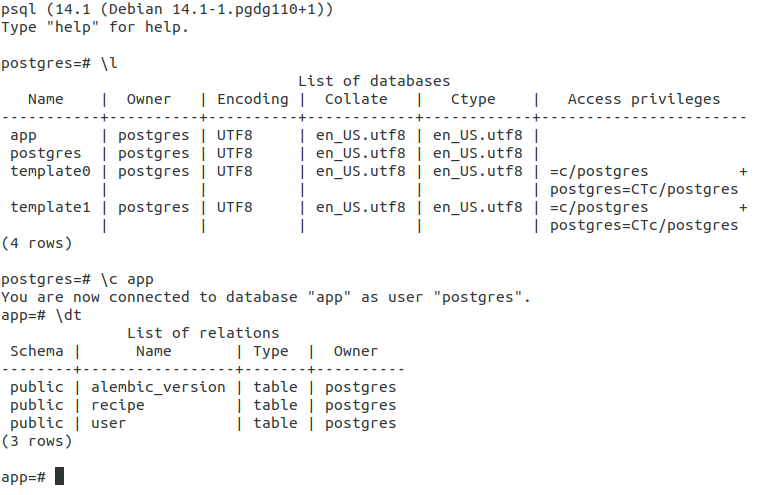
- Finally, check the new user you created via the interactive docs is there by running
SELECT * FROM "user";(note the quotes around the user table).
Great! Everything is working locally. Let’s crack on with the deployment.
side note, to stop your containers and delete their data run: docker-compose -f docker-compose.local.yml down -v
Practical Section 2 - Deploying the Backend to Heroku
PostgreSQL Deployment with FastAPI
On a virtual machine, you could install postgres and configure it to run. But this is a pretty dated way and labor intensive way to operate (although it does mean you are in full control). Modern deployments will usually connect to cloud postgres databases, such as AWS RDS or AWS Aurora. Once these are provisioned, we just need to pass the correct connection string to our SQLAlchemy database adapter.
In our case, we will use a slightly simpler (but still perfectly valid) option: we’ll use the Heroku postgres add-on. This is a managed Postgres service we can provision and connect to.
The advantage of using this for learning is that it’s very easy to setup and the Hobby Dev plan is free. Also, as a result of using this service, we only need to
run one container (the FastAPI application), which is why for this particular deployment we don’t need Docker Compose, we can get away with our lone Dockerfile. Note
that the docker-compose file we’ve been using for local dev can be modified for prod deployment, see here for an example.
For our deploy we will need to:
- Create a Heroku account (it’s free) over at https://heroku.com/
- Create an app (free hobby tier) - make a note of your app name as we’ll need it later
- Select the postgres add-on (free hobby tier)
- Install the Heroku CLI
TODO: SCREENSHOTS
In part 13, we added a Makefile to the example project repo. This file contains the commands you need to run via the Heroku CLI.
Deploy Step 1: Build Image
cd part-13-docker-deploymentmake build-app-heroku(under the hood this doesdocker build)
You should see Successfully built in the terminal, as well as tagged with:
registry.heroku.com/${YOUR_APP_NAME}/web:latest

This means the image has been built.
Note, if you’re on Windows Makefile commands won’t work. Either try this work-arounds
or run the raw commands found in the Makefile on their own.
Deploy Step 2: Publish Image to Heroku Registry
Now we need to push the image somewhere Heroku can access it. That place is the Heroku container registry.
For the next Makefile commands to work, you’ll need to update:
HEROKU_APP_NAMEHEROKU_API_KEY
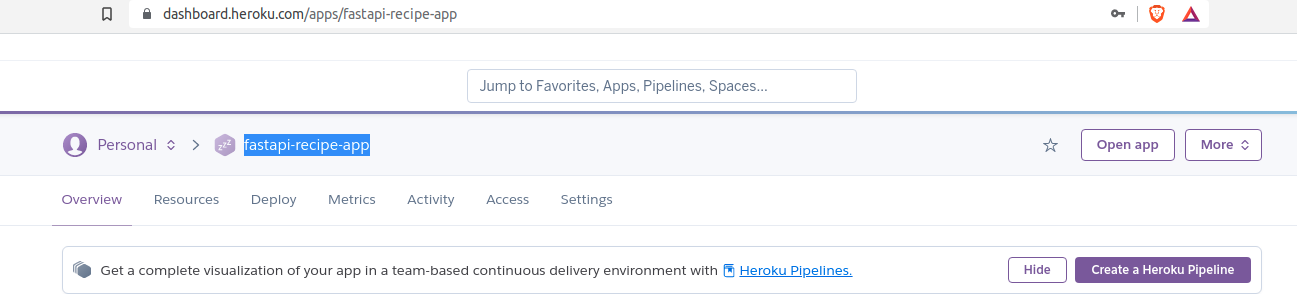
You can find your app name using the Heroku CLI, with command: heroku apps. Or look in the Heroku UI:
Your HEROKU_API_KEY can be found in Account settings -> Scroll down -> Regenerate API Key:

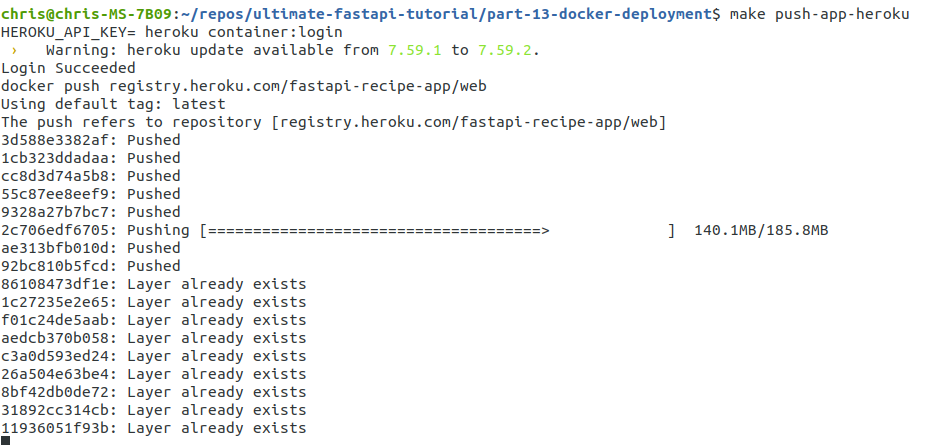
Once you have these set, run:
make push-app-heroku
Pushing the image up to the registry will take a few minutes:
Deploy Step 3: Trigger Deployment via Heroku CLI
Now that your image is up in the registry, the last step is to actually trigger the deployment. Under the hood, this is done via the heroku container:release command which
Releases previously pushed Docker images to your Heroku app
With our Makefile, we run:
make release-heroku
In your terminal you should see:
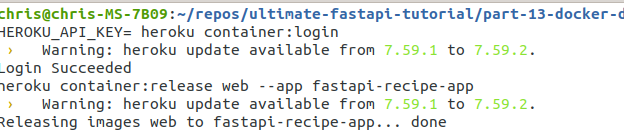
To check the release occurred, you can run the heroku ps --app ${YOUR_APP_NAME} command. You should see:

Notice the time (1m) since the deploy is shown. You can also see this in the Heroku dashboard on the activity tab.
Our FastAPI app is live! Here’s the one I made (yours will have a different URL): https://fastapi-recipe-app.herokuapp.com/docs
Deploy Step 4: Automate Deployment via CI/CD
Deploying your app from the command line is error-prone and dangerous. Best practice is to do this via a continuous integration and continuous deployment (CI/CD) process. A full overview of this topic is beyond the scope of this blog post (Here’s Martin Fowler’s article on it if you need a crash course). But the project repo deploys everything via CI/CD, so you have an example using all the above Makefile commands in the circleCI config file: https://github.com/ChristopherGS/ultimate-fastapi-tutorial/blob/main/.circleci/config.yml#L28
Practical Section 3 - Deploying the Frontend to Heroku
Our backend is deployed, so now all that remains is for us to deploy our React frontend from part 12.
We’ll want to make one config tweak to the frontend. In frontend/src/config.js
import runtimeEnv from '@mars/heroku-js-runtime-env';

const env = runtimeEnv();
const config = {
  apiBasePath: env.REACT_APP_API_BASE_PATH || 'https://fastapi-recipe-app.herokuapp.com',
  reactAppMode: process.env.REACT_APP_MODE || 'dev',
};

export default config;
We need to install the @mars/heroku-js-runtime-env dependency so that our React environment variables can get
picked up. You’ll also want to update the value of env.REACT_APP_API_BASE_PATH to be your deployed Heroku backend
URL.
There are many ways to deploy a React app, and the docs are very comprehensive on this topic and your options. We’re going to use Heroku just to keep our infrastructure consistent (less complexity to manage). However, unlike the backend we’re not containerizing our frontend. This means that our deploy process with Heroku is even simpler, it’s via the git approach.
We will to need to create a new heroku app for our frontend, which you can do via the CLI or the dashboard web UI:

Make a note of your frontend app name.
In this approach, Heroku creates a git remote under the hood, and whenever new git pushes are received to this remote, Heroku triggers a new build/deploy sequence.
If you look at the Makefile, you’ll find quite an intimidating looking command to trigger this:
cd .. && git subtree push --prefix part-13-docker-deployment/frontend https://heroku:${HEROKU_API_KEY}@git.heroku.com/$(HEROKU_FRONTEND_APP_NAME).git main
The reason for this complexity is the example project monorepo structure. Because each part of the tutorial is effectively a container app (which usually would
be in its own repo), then this runs against what Heroku typically expects. If you’re running a monorepo with Heroku you’d usually use a monorepo build pack.
In our case, however, we can use a bit of advanced git with the subtree command, to instruct git to just
push the files within a particular directory (`part-13-docker-deployment/frontend). We specify the origin (which is a heroku remote) and the branch (master) and that
triggers the deployment. So run:
note you need to have set your HEROKU_API_KEY environment variable, and in the Makefile you need to set HEROKU_FRONTEND_APP_NAME
make deploy-frontend-heroku
You should see the following confirmation in the terminal after a few minutes of deployment:
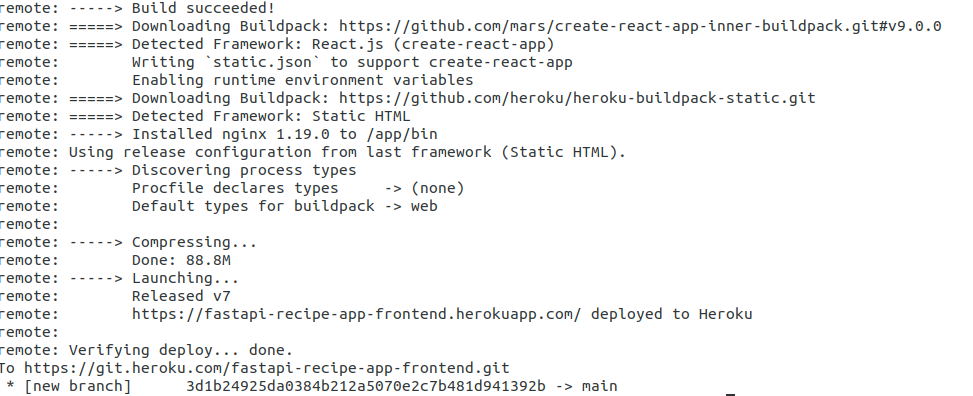
Again, this can also be checked via CLI (`heroku ps –app ${YOUR_FRONTEND_APP}) or in the dashboard
Our frontend is now released! You can look at the CI config file from the example to repo to see this deployment automated.
Now we can visit our deployed frontend app! Here’s my example.
We’ve come a long way! In future posts I’m going to explore more advanced topics and add more features to our example app. If you have requests, please feel free to DM me on Twitter (@ChrisSamiullah)
Continue Learning FastAPI
More coming soon!