The Ultimate FastAPI Tutorial Part 6 - Serving HTML with Jinja Templates
In part 6 of the FastAPI tutorial, we'll look at serving HTML via Jinja2 templates
Introduction
Welcome to the Ultimate FastAPI tutorial series. This post is part 6. The series is a project-based tutorial where we will build a cooking recipe API. Each post gradually adds more complex functionality, showcasing the capabilities of FastAPI, ending with a realistic, production-ready API. The series is designed to be followed in order, but if you already know FastAPI you can jump to the relevant part.
Code
Project github repo directory for this part of the tutorial
Tutorial Series Contents
Optional Preamble: FastAPI vs. Flask
Beginner Level Difficulty
Part 1: Hello World
Part 2: URL Path Parameters & Type Hints
Part 3: Query Parameters
Part 4: Pydantic Schemas & Data Validation
Part 5: Basic Error Handling
Part 6: Jinja Templates
Part 6b: Basic FastAPI App Deployment on Linode
Intermediate Level Difficulty
Part 7: Setting up a Database with SQLAlchemy and its ORM
Part 8: Production app structure and API versioning
Part 9: Creating High Performance Asynchronous Logic via async def and await
Part 10: Authentication via JWT
Part 11: Dependency Injection and FastAPI Depends
Part 12: Setting Up A React Frontend
Part 13: Using Docker, Uvicorn and Gunicorn to Deploy Our App to Heroku
Part 14: Using Docker and Uvicorn to Deploy Our App to IaaS (Coming soon)
Part 15: Exploring the Open Source Starlette Toolbox - GraphQL (Coming soon)
Part 16: Alternative Backend/Python Framework Comparisons (i.e. Django) (Coming soon)
Post Contents
Practical Section - Serving HTML in FastAPI
Theory Section - Understanding Jinja Templates
![]()
Practical Section - Serving HTML in FastAPI
So far in our tutorial series, the only HTML available to view has been the interactive documentation UI which FastAPI offers out of the box. Time now to add a deliberately simple HTML page. We’ll code and run it first (doing beats talking), then further down we’ll discuss Jinja2, and what a more realistic approach for serving HTML would be in larger projects.
If you haven’t already, go ahead and clone the example project repo
cd to the part-6 directory, see the README file for local setup.
Run the application locally with poetry run ./run.sh
Now when you navigate to http://localhost:8001 you will be greeted by a new screen:
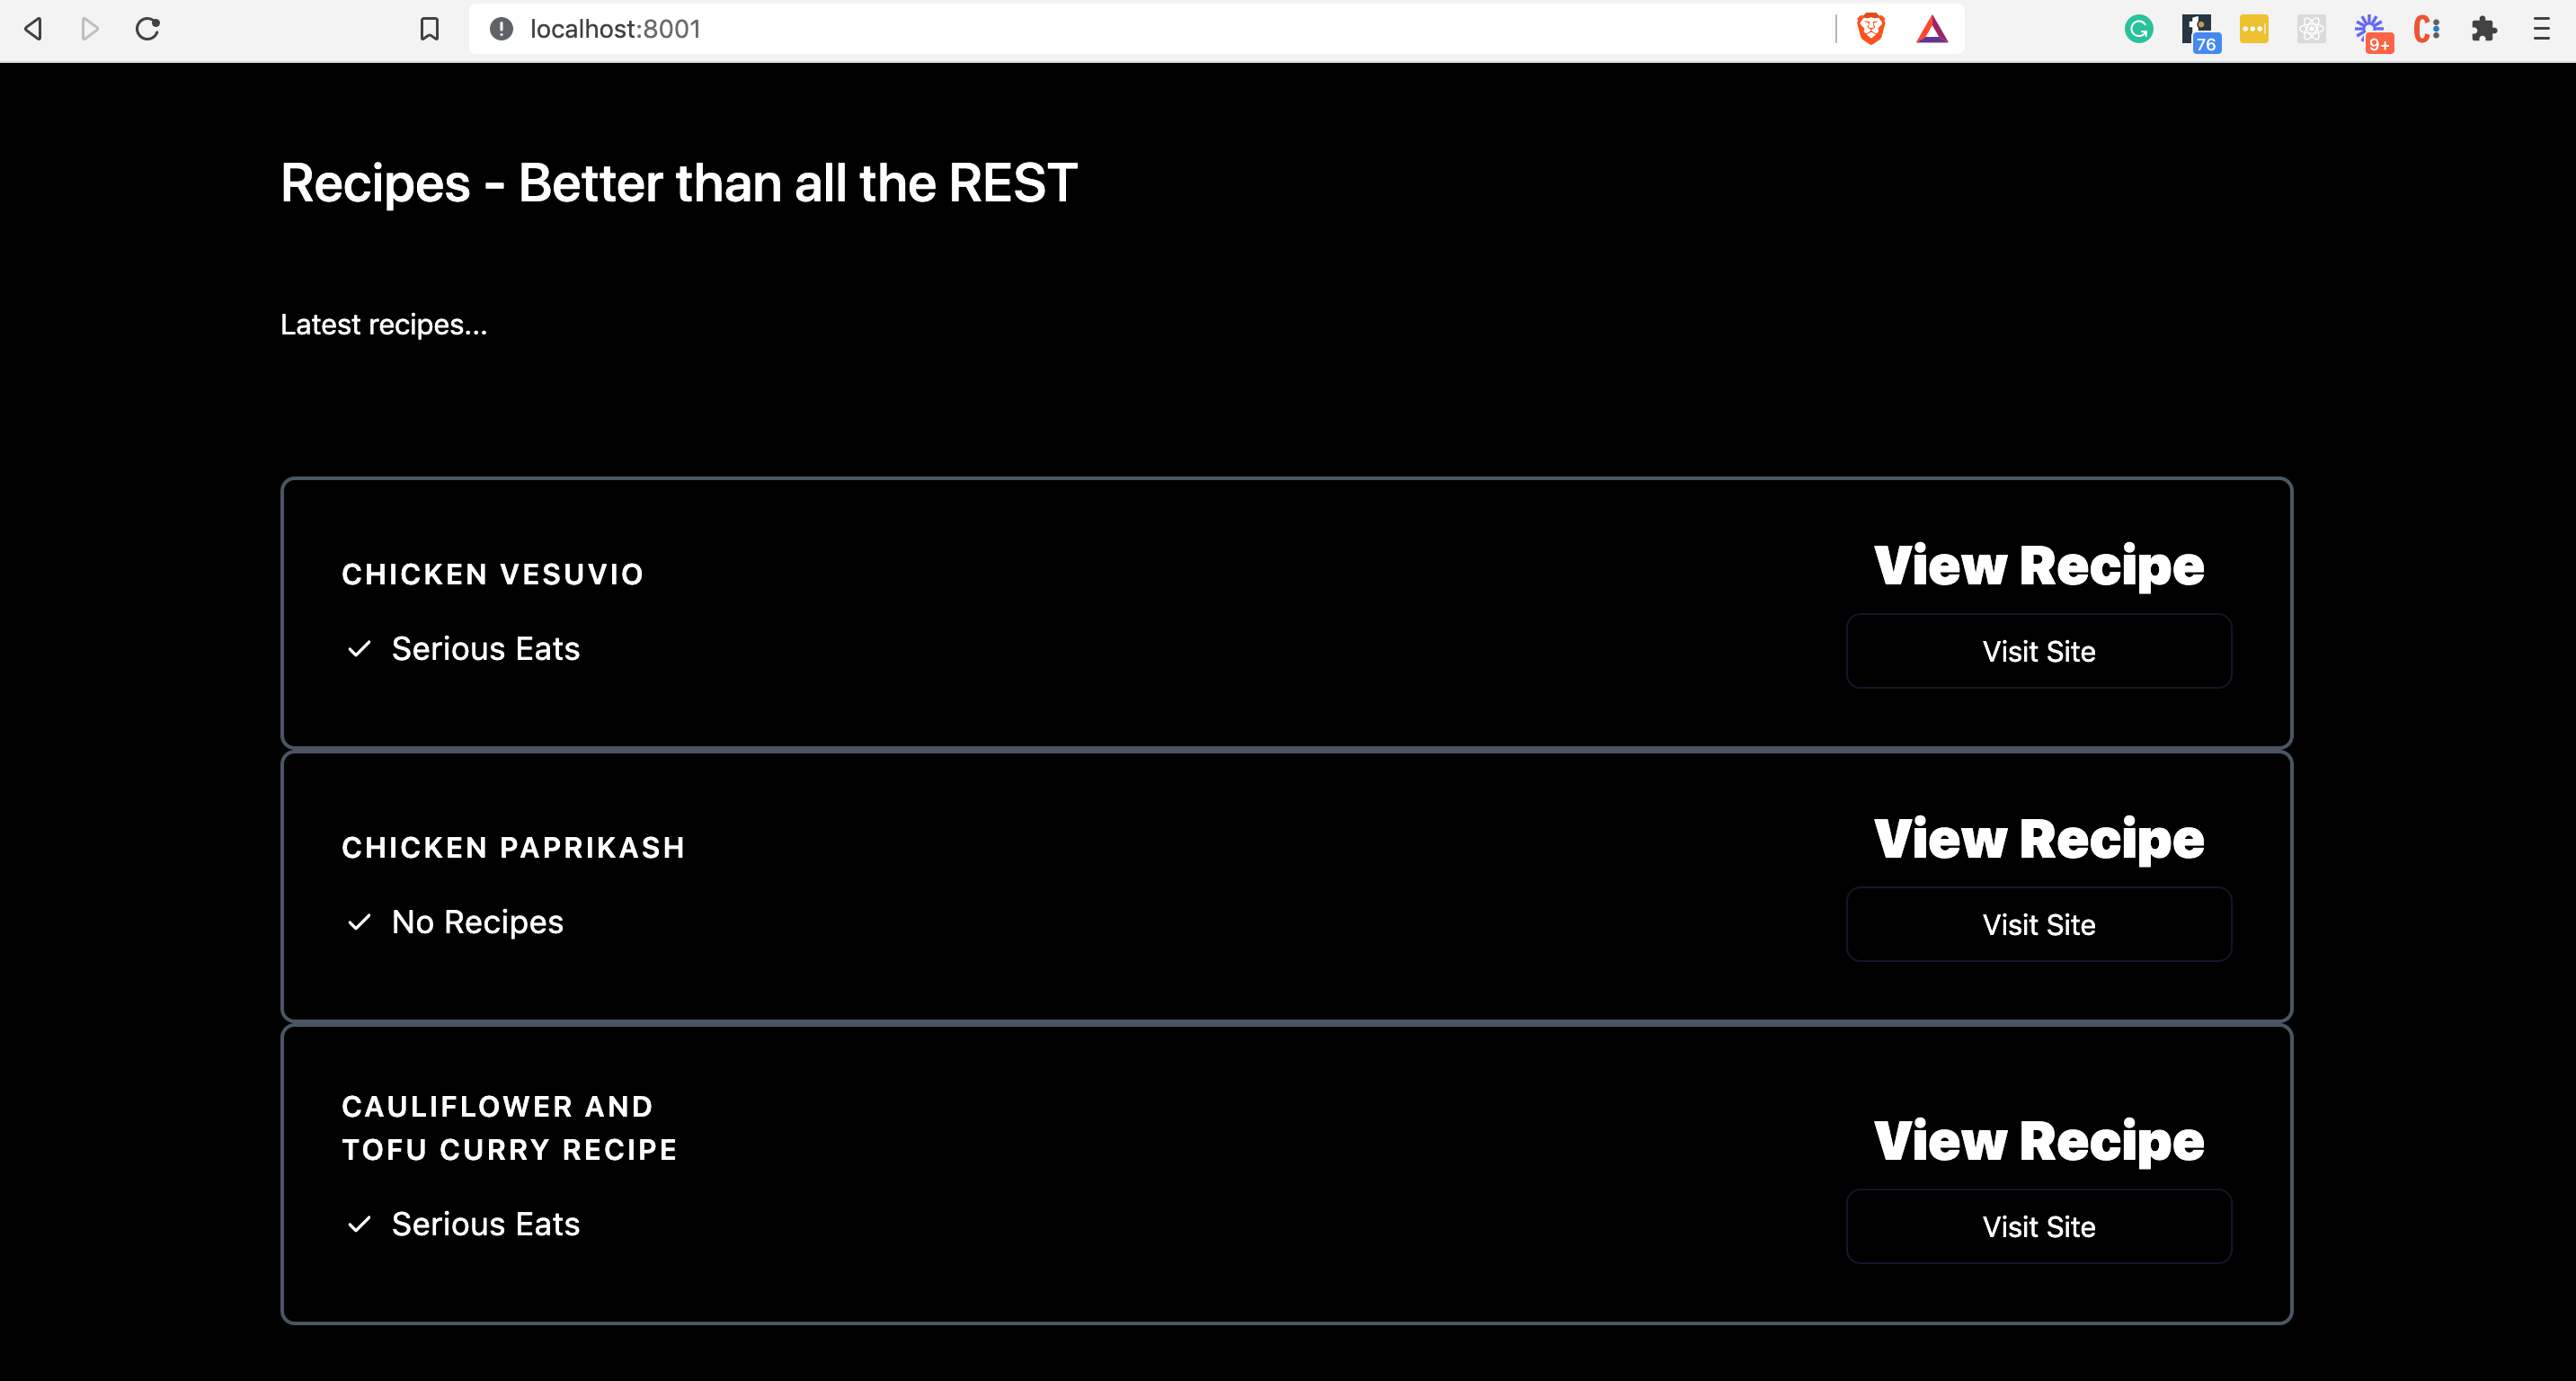
Give it a try.
Now, let’s understand how this works.
In the app/main.py file, you will find the following new code:
from fastapi import FastAPI, APIRouter, Query, HTTPException, Request
from fastapi.templating import Jinja2Templates

from typing import Optional, Any
from pathlib import Path

from app.schemas import RecipeSearchResults, Recipe, RecipeCreate
from app.recipe_data import RECIPES


# 1
BASE_PATH = Path(__file__).resolve().parent
TEMPLATES = Jinja2Templates(directory=str(BASE_PATH / "templates"))


app = FastAPI(title="Recipe API", openapi_url="/openapi.json")

api_router = APIRouter()


# Updated to serve a Jinja2 template
# https://www.starlette.io/templates/
# https://jinja.palletsprojects.com/en/3.0.x/templates/#synopsis
@api_router.get("/", status_code=200)
def root(request: Request) -> dict:  # 2
    """
    Root GET
    """

    # 3
    return TEMPLATES.TemplateResponse(
        "index.html",
        {"request": request, "recipes": RECIPES},
    )

# skipping...
There are three key updates to our main.py module to highlight:
- We specify our Jinja templates directory by using the standard library
pathlibmodule to point to the template’s directory’s full system path. - We’ve updated the root endpoint, defined in our
rootfunction. The function now takes the FastAPIRequestclass as an argument. This is equivalent to Starlette’s Request class which gives direct and lower-level access to the incoming request. - The reason we need access to the request class is that the function now
returns the FastAPI dedicated
TemplateResponse. When instantiating this response object, the first argument required is the specific template file (index.htmlin this case) followed by a dictionary with the request object and any template variables (in our case, the list of recipesRECIPES)
Naturally, the other key addition to the example project at this point in the tutorial series
is the template itself. This is located in app/templates/index.html
Two key things to highlight from the (truncated) sample above:
- The tailwind CSS library is used to style the HTML. A full overview of tailwind is beyond the scope of this series, but the quick summary is that HTML element classnames define CSS properties, including things like responsive grid layouts.
- The Jinja2 template syntax, denoted by the curly brace ‘{‘ followed by the percentage sign ‘%’
Here Jinja allows us to loop over the
recipesvariable passed to the template.
Exercise: Use the POST endpoint we added in part 5 to create a new recipe, and then refresh the home page to see it displayed.
Theory Section - Understanding Jinja Templates
A templating language allows you to generate HTML/XML or some other markup language with the aid of variables and a constrained amount of programming logic.
The variables and bits of logic are marked with tags, as we saw above with the loop.
Jinja2 is a popular templating language used by Flask, Bottle, Pelican) and optionally by Django.
Real Python has an excellent primer on using Jinja
FastAPI and Jinja
FastAPI is really designed for building APIs and microservices. It can be used for building web applications that serve HTML using Jinja, but that’s not what it is really optimized for.
If you want to build a large website with lots of HTML rendered on the server, Django is probably a better choice.
However, if you’re building a modern website with a frontend framework like React, Angular or Vue, then fetching data from FastAPI is a good fit (we’ll be looking at this later in the series).
As a result, in this example series, we’re going to use Jinja templates quite sparingly, which is also how they would be used in most real projects. My reasoning for introducing an HTML page at this point in the series is:
- It will make the example project more engaging. Engaging tutorials are better learning tools.
- Knowing how to serve ad hoc HTML pages (e.g. for user logins/password confirmation pages) is a common requirement.
Continue Learning FastAPI
In the next part of the tutorial, we’ll look at a basic deployment of our app in its current form.