The Ultimate FastAPI Tutorial Part 6b - Basic Deployment on Linode
In part 6b of the FastAPI tutorial, we'll look at a basic deployment on Linode with unicorn, gunicorn and nginx
Introduction
Welcome to the Ultimate FastAPI tutorial series. This post is part 6b. The series is a project-based tutorial where we will build a cooking recipe API. Each post gradually adds more complex functionality, showcasing the capabilities of FastAPI, ending with a realistic, production-ready API. The series is designed to be followed in order, but if you already know FastAPI you can jump to the relevant part.
Code
Project github repo directory for this part of the tutorial
Tutorial Series Contents
Optional Preamble: FastAPI vs. Flask
Beginner Level Difficulty
Part 1: Hello World
Part 2: URL Path Parameters & Type Hints
Part 3: Query Parameters
Part 4: Pydantic Schemas & Data Validation
Part 5: Basic Error Handling
Part 6: Jinja Templates
Part 6b: Basic FastAPI App Deployment on Linode
Intermediate Level Difficulty
Part 7: Setting up a Database with SQLAlchemy and its ORM
Part 8: Production app structure and API versioning
Part 9: Creating High Performance Asynchronous Logic via async def and await
Part 10: Authentication via JWT
Part 11: Dependency Injection and FastAPI Depends
Part 12: Setting Up A React Frontend
Part 13: Using Docker, Uvicorn and Gunicorn to Deploy Our App to Heroku
Part 14: Using Docker and Uvicorn to Deploy Our App to IaaS (Coming soon)
Part 15: Exploring the Open Source Starlette Toolbox - GraphQL (Coming soon)
Part 16: Alternative Backend/Python Framework Comparisons (i.e. Django) (Coming soon)
Deploying FastAPI Apps
This is a serious tutorial designed to get you ready to create and deploy a production-ready API. There will be quite a few deployment posts scattered throughout the tutorial, each of which will gradually increase in complexity. We start with this basic version and ratchet complexity later, as we grow stronger and wiser. Later posts will cover:
- Deploying on Heroku and AWS
- Doing the deployment in a CI pipeline (best practice)
- Dockerizing the app
- Deploying containers
- Dealing TLS/SSL & custom domains
Deployment Options
Broadly speaking, when you’re deciding how to deploy your app you’ve got two main choices (ignoring running your own hardware, which is more niche these days):
- A Platform as a Service (PaaS)
- Smaller Infrastructure as a Service (IaaS)
With a Platform as a Service, all the config is done for you, but you get less control. It tends to be more expensive. With Infrastructure as a Service (Iaas) you have to configure more, but you get a lot of control, and it tends to be cheaper.
In this post, I’ll show you how to use Linode for deploying your FastAPI app, in later posts I’ll show you how to use other options.
Linode Free Credit
Linode is an IaaS cloud computing provider that give you reliable Linux virtual machines in the cloud.
If you use this affiliate link you’ll get $100 credit
Deployment Step 1: Create Linode Account
Use the link above.
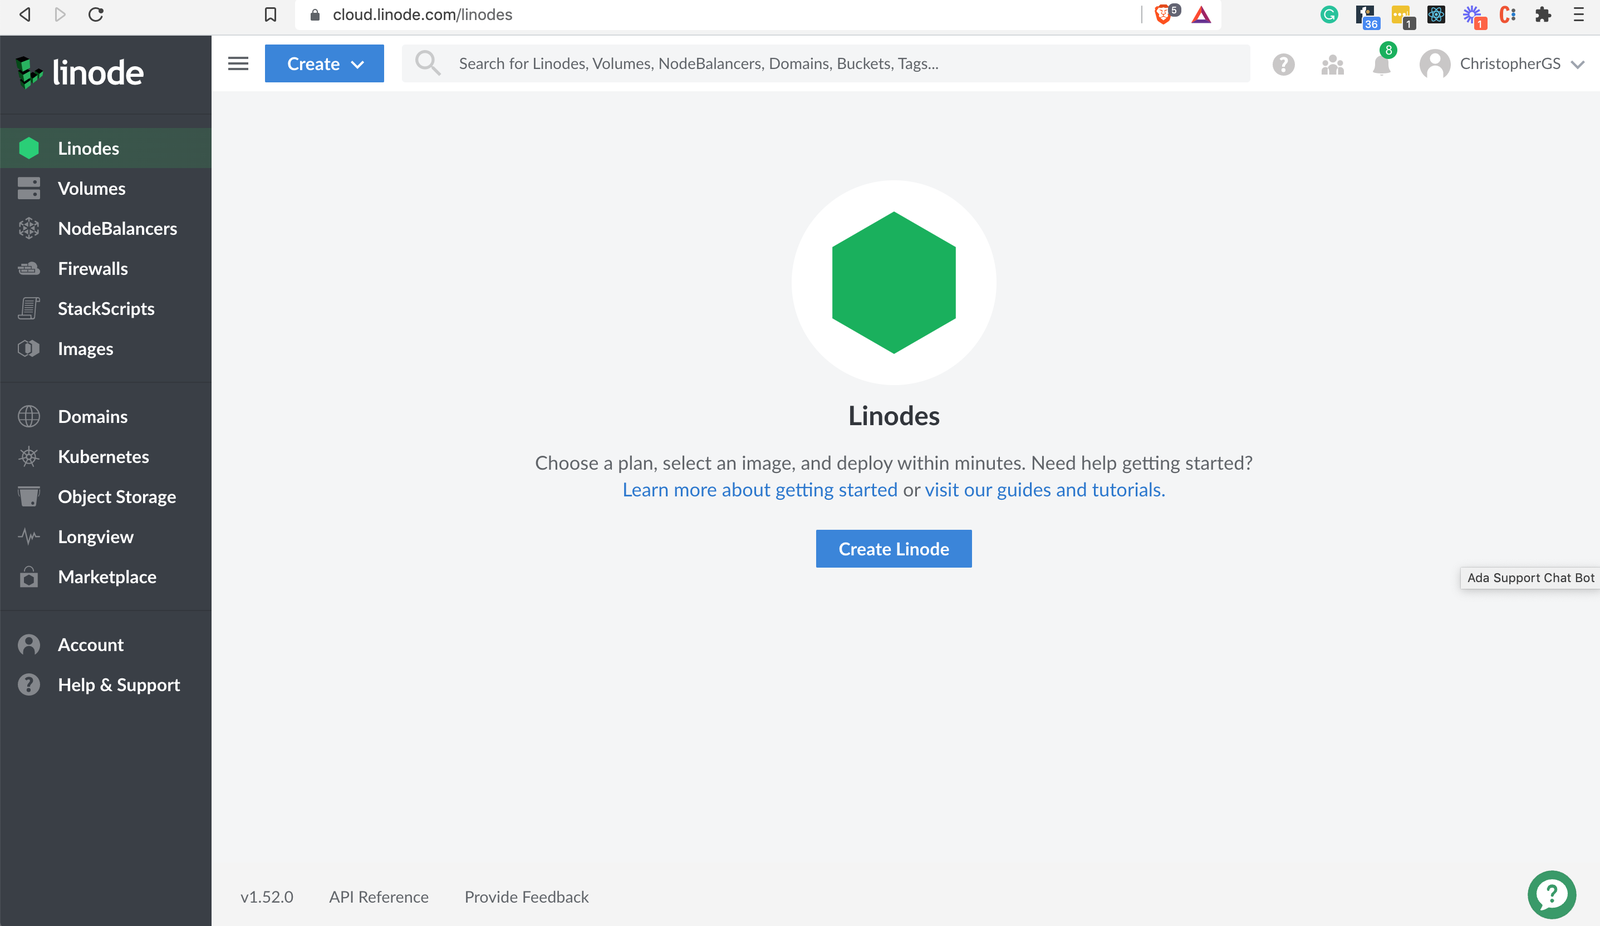
Deployment Step 2: Create VM
Linode refers to each virtual machine (VM) as a “Linode”. Once you’ve logged in to the dashboard, click “Create Linode”
Deployment Step 3: Configure Linode
-
Choose Ubuntu 20.04 LTS for your distribution (this is what I have tested)
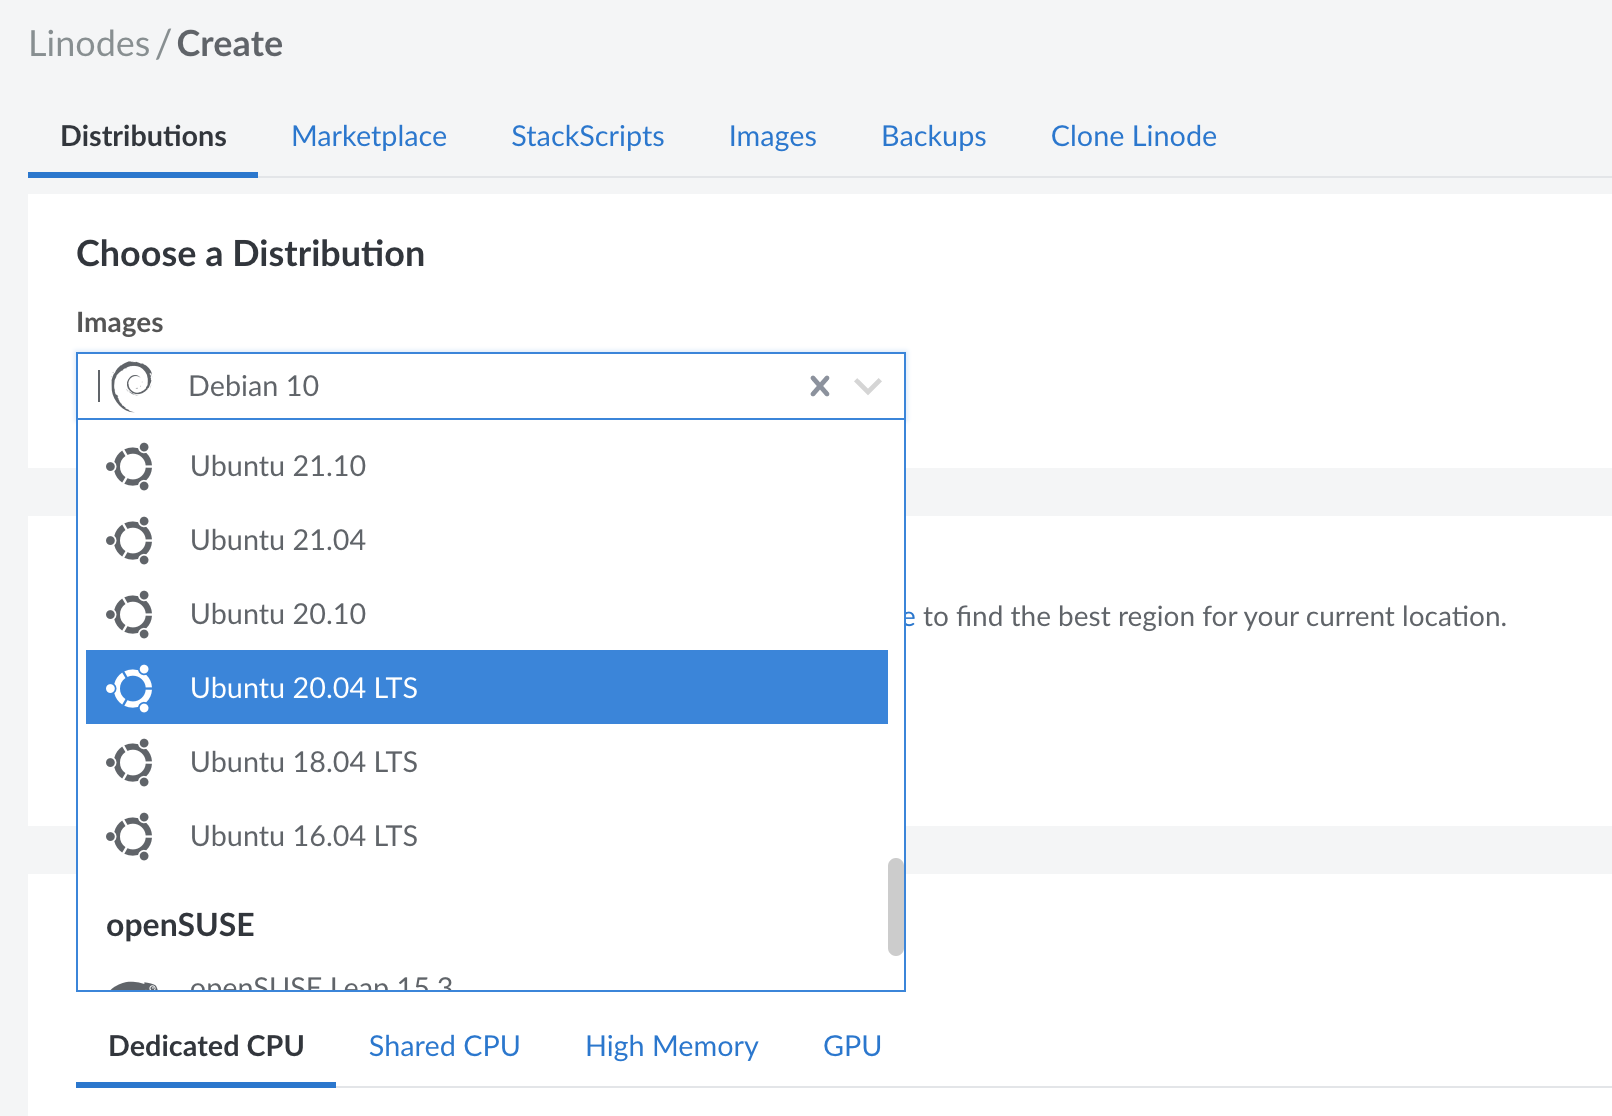
-
Choose a region near where you live
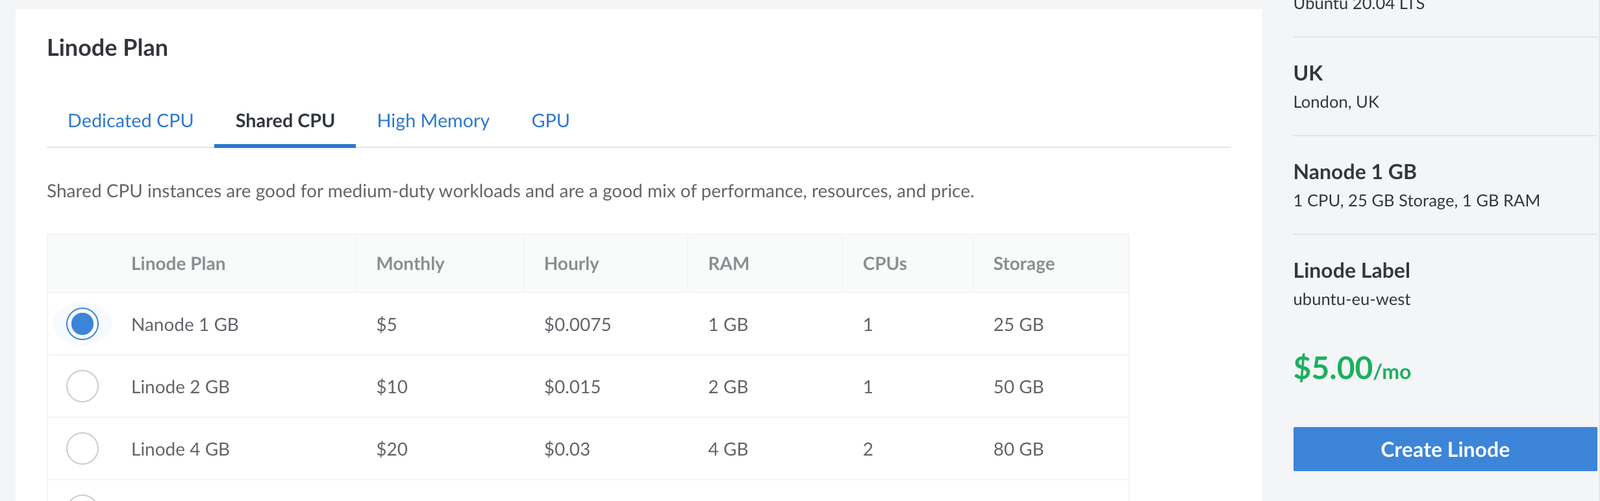
Important: Choose the Right Plan
You want to go to Shared CPU -> Nanode 1 GB. This will provision the
least resource-intensive VM - which is fine for learning purposes. This
costs $5 per month (but you can use the affiliate link
to get $100 free credit).
- You can leave the rest of the config settings as default/empty and click “Create Linode”
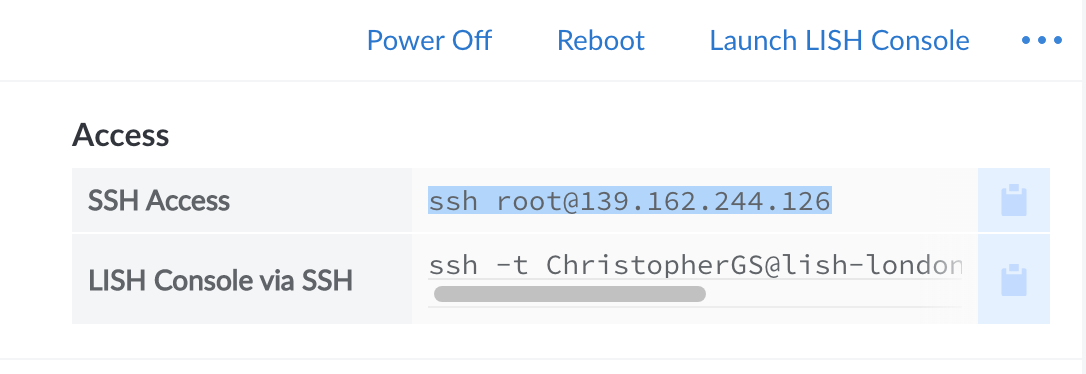
Deployment Step 4: SSH into your Linode
After your VM finishes provisioning (which takes a couple of minutes), on the dashboard
you’ll find a section called Access, which has SSH command details:
If you’re not familiar with SSH, here’s a primer. From your terminal (or if you’re on Windows an SSH client like PuTTY) SSH into your VM. You’ll see a prompt like this:
Are you sure you want to continue connecting (yes/no)?- typeyesand hit enter.- It will prompt you for your Linode password
- Now you should be into your VM
Deployment Step 5: Clone the Repo
In order to deploy our app, we need to copy the source code to the VM. The easiest way to do this is to clone the repo (note, use HTTPS clone to save the hassle of setting up git SSH keys). From your VM SSH session type:
git clone https://github.com/ChristopherGS/ultimate-fastapi-tutorial.git
Deployment Step 6: Install Some Basics
Most of our deployment is going to be triggered using a Makefile.
In order to use it, we have to install the make. Therefore enter the following commands:
sudo apt updatesudo apt install make
Check the install worked by typing make you should see: make: *** No targets specified and no makefile found. Stop.
Great, we’re ready to proceed with the main part of the deployment.
Deployment Step 7: Install App Dependencies
- Still in your SSH session,
cdinto theultimate-fastapi-tutorial/part-06b-basic-deploy-linode/directory. - Run
make linode_installthis will take a ~5 mins to run. Let’s take a look at the command code:
linode_install:
    sudo apt -y upgrade
    sudo apt -y install python3-pip  # Install Python
    pip install poetry  # Install Poetry
    poetry install  # Install the app dependencies in our pyproject.toml file (recall we use this instead of a requirements.txt)
    sudo apt -y install nginx  # Install nginx
    sudo cp nginx/default.conf /etc/nginx/sites-available/fastapi_app  # Copy the nginx config
    # Disable the NGINX’s default configuration file by removing its symlink
    sudo unlink /etc/nginx/sites-enabled/default
    sudo ln -s /etc/nginx/sites-available/fastapi_app /etc/nginx/sites-enabled/
Once this step is complete, the last step is to trigger the deployment.
Deployment Step 8: Trigger the Deployment
Still in your SSH session, run:
make linode_run
You should see Application startup complete in the terminal
Leave this running.
Review the Deployment
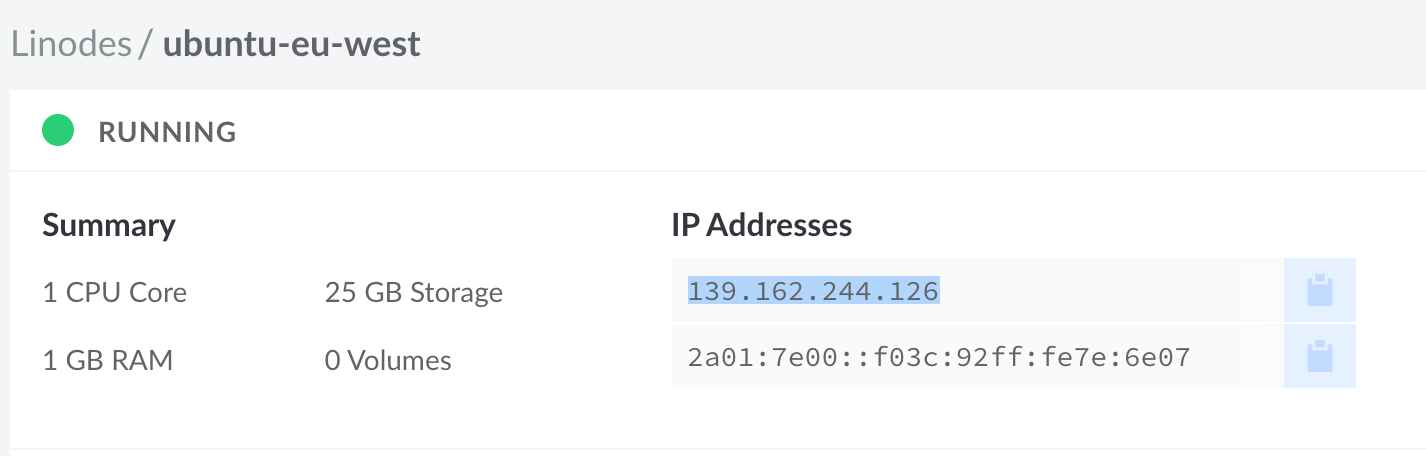
Head back to your Linode dashboard, and spot your Linode’s IP address
Copy and paste this into your browser and voila! You should see our familiar recipe API home screen:
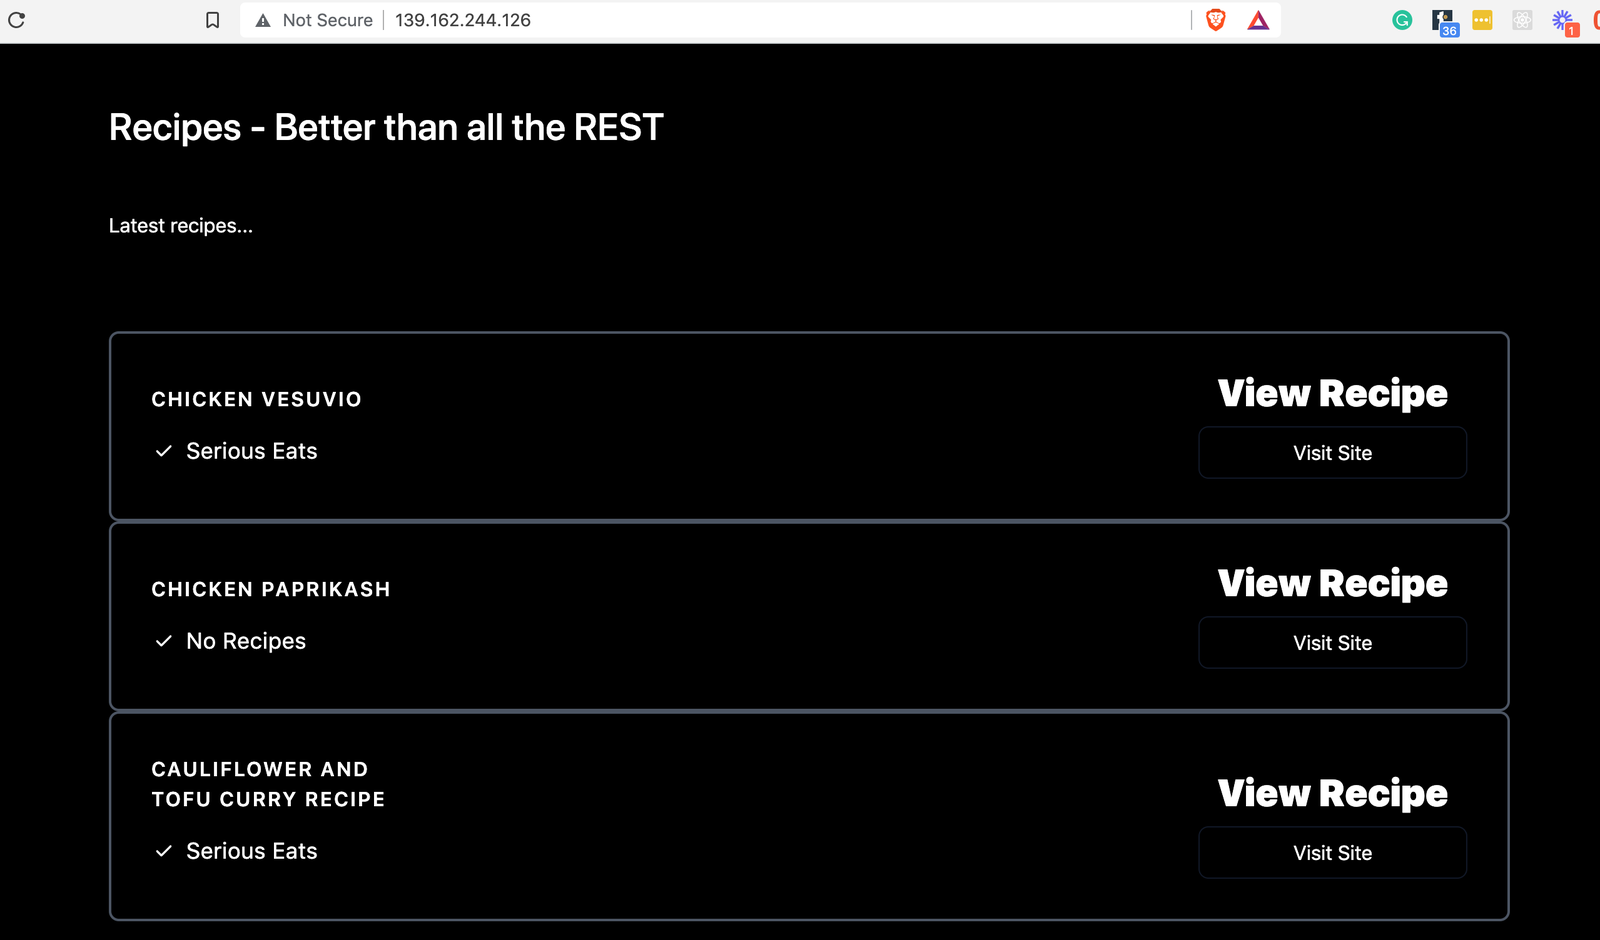
Congrats - you’ve deployed your FastAPI web application! Go ahead and visit the /docs endpoint and have a play with the JSON responses in the interactive UI. Everything should work the same as it did locally.
Understanding What Happened
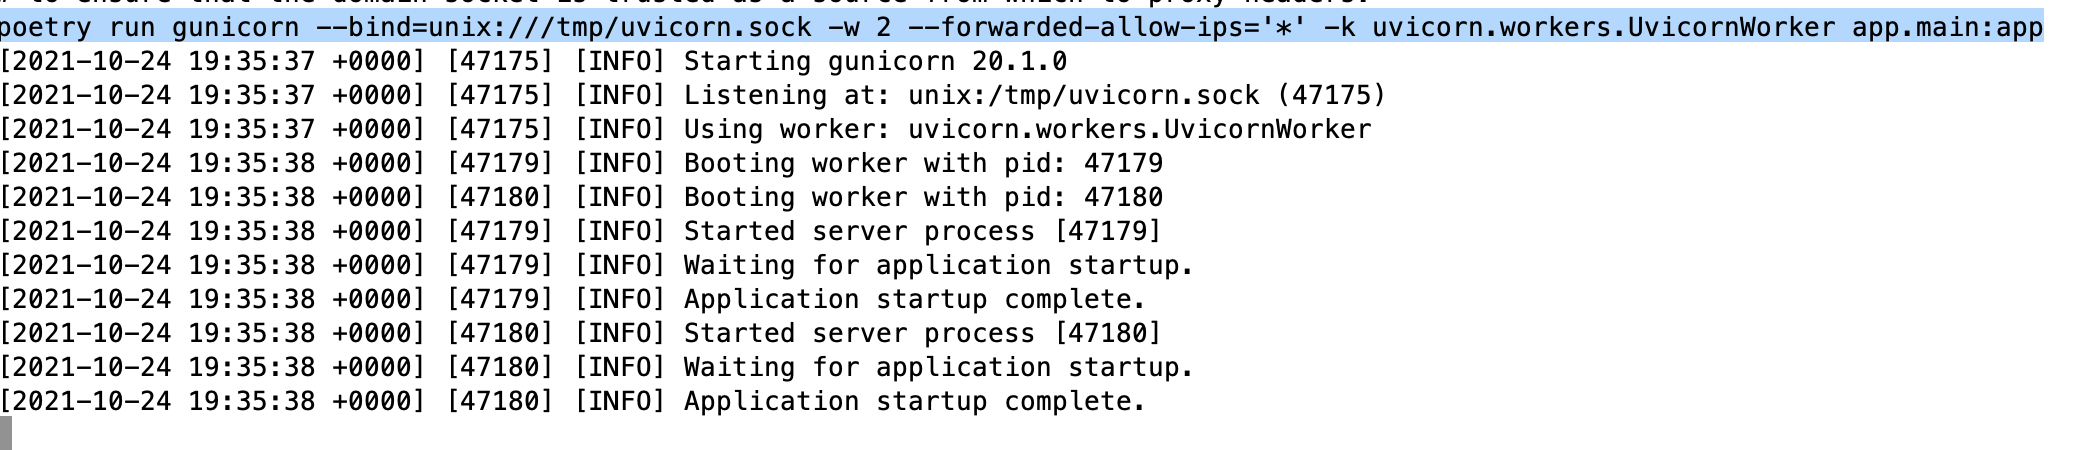
The make linode_run command reloads nginx and then triggers this confusing looking command:
poetry run gunicorn --bind=unix:///tmp/uvicorn.sock -w 2 --forwarded-allow-ips='*' -k uvicorn.workers.UvicornWorker app.main:app
What’s happening here? Basically, we’ve wrapped our familiar uvicorn web server command
(from our run.sh bash script) in gunicorn. Why do we need both gunicorn and uvicorn?
Here’s the relevant snippet from the docs:
But Gunicorn supports working as a process manager and allowing users to tell it which specific worker process class to use. Then Gunicorn would start one or more worker processes using that class. And Uvicorn has a Gunicorn-compatible worker class. Using that combination, Gunicorn would act as a process manager, listening on the port and the IP. And it would transmit the communication to the worker processes running the Uvicorn class. And then the Gunicorn-compatible Uvicorn worker class would be in charge of converting the data sent by Gunicorn to the ASGI standard for a FastAPI application to use it.
In short, gunicorn gives us process management capabilities that uvicorn does not possess.
We configure gunicorn with the --bind command, which is set to a UNIX domain socket (instead of a typical
host and port like http://127.0.0.1:8000). This is recommended practice for production apps, as described here in the
uvicorn docs.
The other key thing we’ve done is configured nginx to act as a reverse proxy.
If you look at the nginx/default.conf you’ll see:
server {
    listen 80;
    client_max_body_size 4G;

    server_name example.com;

    location / {
      proxy_set_header Host $http_host;
      proxy_set_header X-Forwarded-For $proxy_add_x_forwarded_for;
      proxy_set_header X-Forwarded-Proto $scheme;
      proxy_set_header Upgrade $http_upgrade;
      proxy_set_header Connection $connection_upgrade;
      proxy_redirect off;
      proxy_buffering off;
      proxy_pass http://uvicorn;
    }

    location /static {
      # path for static files
      root /path/to/app/static;
    }
}

map $http_upgrade $connection_upgrade {
    default upgrade;
    '' close;
}

upstream uvicorn {
    server unix:/tmp/uvicorn.sock;
}
Notice the line proxy_pass where we proxy incoming requests
to the uvicorn upstream, which we in turn define at the bottom of the
file as unix:/tmp/uvicorn.sock;, which is what we told gunicorn to
expect via the --bind configuration.
This deployment getting towards production-ready. The obvious hole in it right now is that if you close your SSH session, you’ll also shutdown the deployment (you’ll get a 502).
How We Would Improve the Deployment
There are many things about this approach which are not best practice. Chiefly, you would not perform each of these manual steps from the command line. Instead, you would configure a continuous integration (CI) pipeline to run the steps for you to reduce the chance of error and to automate the process. However, in the context of this tutorial, I think it’s useful to get a feel for how things work. In future posts, we’ll look at:
- Running the deployment as a background process with Supervisor
- Deploying on Heroku and AWS
- Doing the deployment in a CI pipeline (best practice)
- Dockerizing the app
- Deploying containers
- Dealing TLS/SSL & custom domains
Continue Learning FastAPI
In the next part of the tutorial, we’ll cover setting up a database in FastAPI.